Navigation
fastbrow
Hardmod
in progress...
Basic outline
Before we start, make sure you have a few things ready:
- A copy of HeXEn
- Torx T15 and T10 screwdrivers
- Soldering iron
- Solder
- Desoldering braid
Optional
- DVD-R + DVD burner (if you don't have a copy of HeXEn on DVD)
- Component cleaner (if your board is dirty)
Method
Note: your xbox will need to be softmodded before attempting to perform the hardmod. To install the softmod, click here-
Determine your xbox revision in the xbox dashboard. If you have a 1.6 revision xbox then you cannot hardmod the xbox.
-
Open up Xbox and remove the motherboard
-
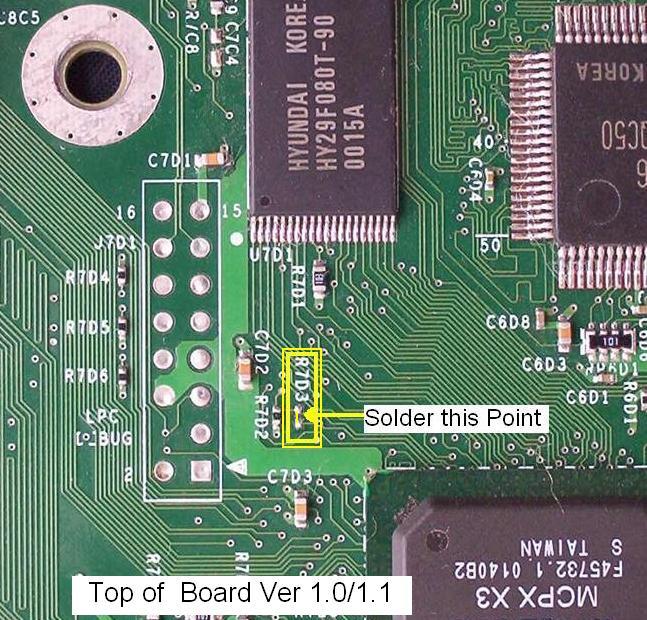
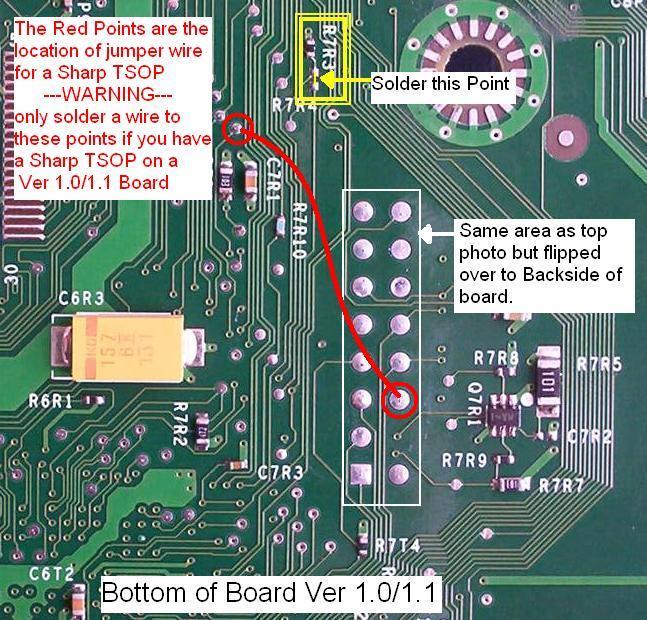
Different xbox revisions will have different solder points on their board. if you have a version 1.0 to 1.1 revision xbox, use this image:


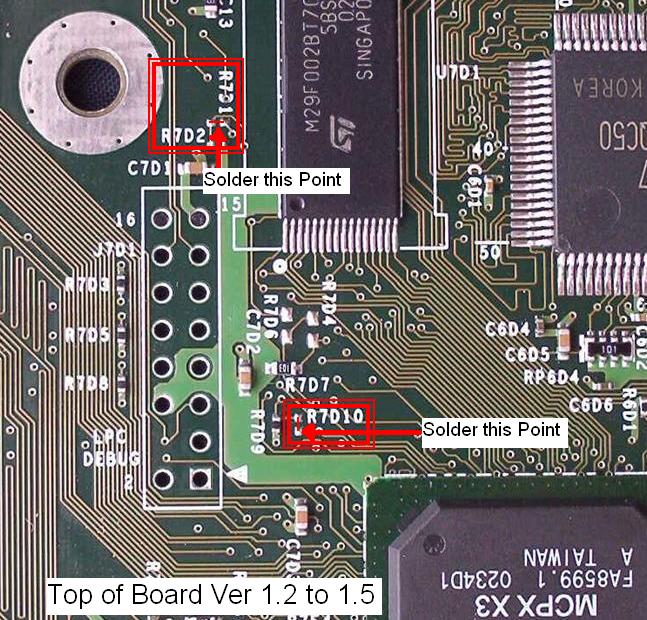
if you have a version 1.2 to 1.5 revision xbox, use this image:

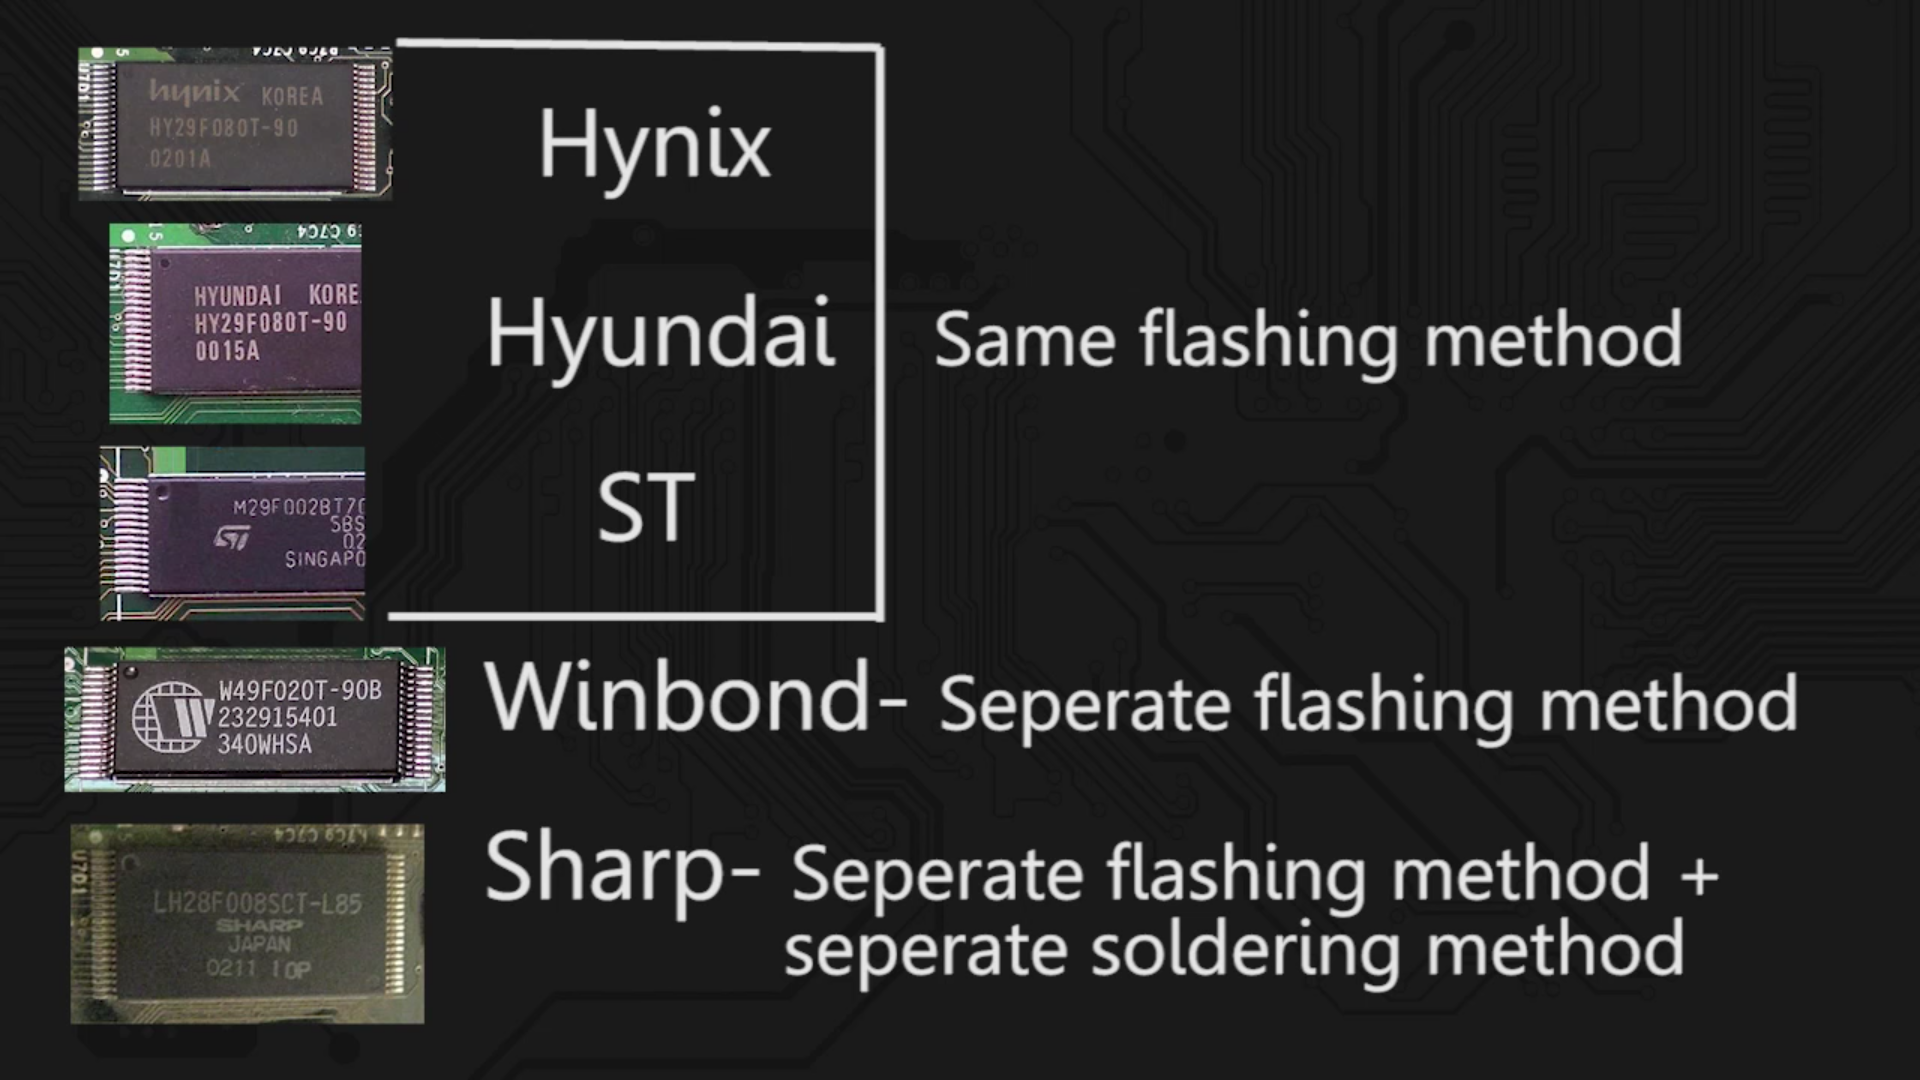
Make a note of what TSOP chip you have. This is important for the flashing method later. Winbond and Sharp chips use a different flashing method.

-
while we're here, we will remove the clock capacitor since they tend to leak and damage the board. Locate it on the board and flip the board over. Use the desoldering braid to remove the solder holding in the capacitor, then remove it. You don't need to replace it as it is only used to store the time when the xbox is unplugged.
-
Put the xbox back together and power it on.
-
Put your copy of HeXEn in the DVD drive and launch it. I have had trouble with reading dual layer discs, so I recommend using a single layer DVD-R disc.
-
In HeXEn, select "TSOP flashed / Chipped xbox tools" then select the flashing method. This is where that TSOP chip brand comes into play. If you have a winbond or sharp TSOP, then select "winbond or sharp flash". Otherwise, use "Modchip / TSOP flash (not winbond)". This will launch the flashing menu. If you have a 1.0 revision xbox, then you can flash the 512kb BIOS. For all other revisions, flash the 256kb BIOS. Press A and it will do the magic for you. After this, your xbox will shut down and you will have to power it on manually.
-
That's it! your xbox now has a custom BIOS and you can now change your hard drive to something larger. Keep the HeXEn disc in case you want to do that.
right side panel